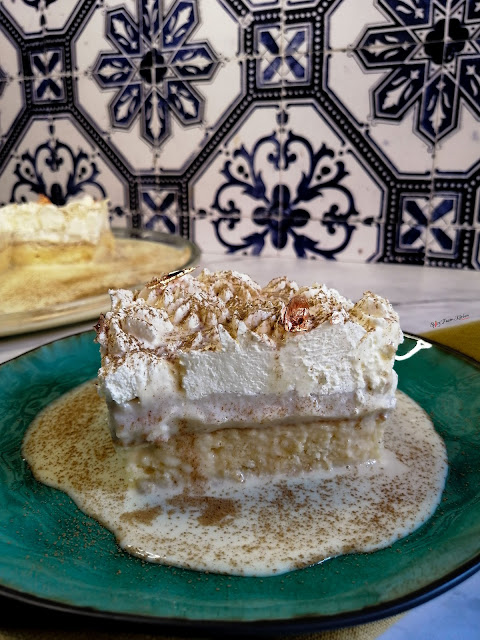
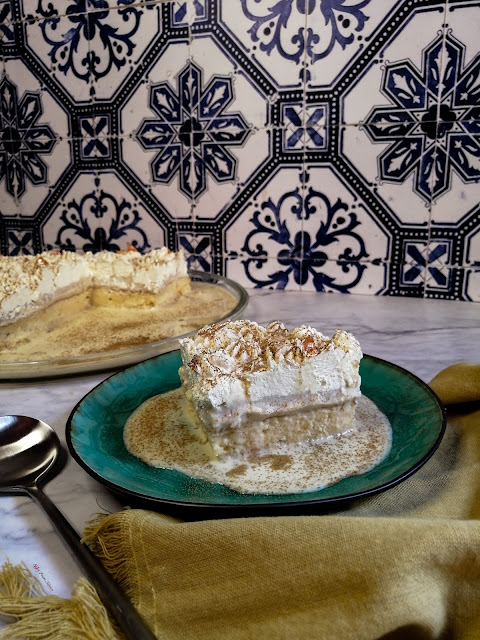
This is what comes into
existence when you can't
figure out whether to make
Milk Tart or a Tres Leches for Eid.

All of last week I was trying to figure out how to make this cake for Eid. I'm not a confident baker, so attempting to put together two
recipes for Eid was stressful, some of you may or may not relate
lol. So anyway, I finally figured it out as I made it, and if I do say so myself it was delicious and a hit with the family. It was a trial that seemingly worked out and I had to share it.
Tres Leches is a Latin American sponge cake that's been soaked in 3 kinds of milks. Milk Tart is a very popular and classic creamy milk pie that originates from South Africa.
There are so many different versions of the Tres Leches Cake recipe out there. I have
shared the 3 classic versions on my site before, so if you'd like to check it
out, click here.
I do have certain things I'd change the next time I make it and I do
suggest reading the tips before going ahead and making it. However, I also
share this in the method, just in case you skip through the post or you
forget while you're baking it.
IMPORTANT TIPS

- You need to bake this in a deep and wide baking pan or casserole dish because there are three layers: the cake layer, the milk tart layer, and the whipped cream topping. The cake layer and the milk tart layer should be in the pan. This is so the milk tart filling sets evenly over the cake. This was the mistake I made. I baked the tres leches cake in a baking pan that was exactly the right size for it, but adding the milk tart filling was an issue. I had to remove the cake from the pan and DIY a barrier around it before adding the milk tart filling. While it did set into its own layer, a bit did drip down the sides of the cake. Hence, why I say from the get-go, bake the tres leches cake in a deep and wide baking pan.
- Let it all set in the fridge for around 1-2 hours minimum, before piping on the whipped cream. I suggest leaving it in the fridge overnight after piping on the whipped cream, yo ensure it all sets properly.
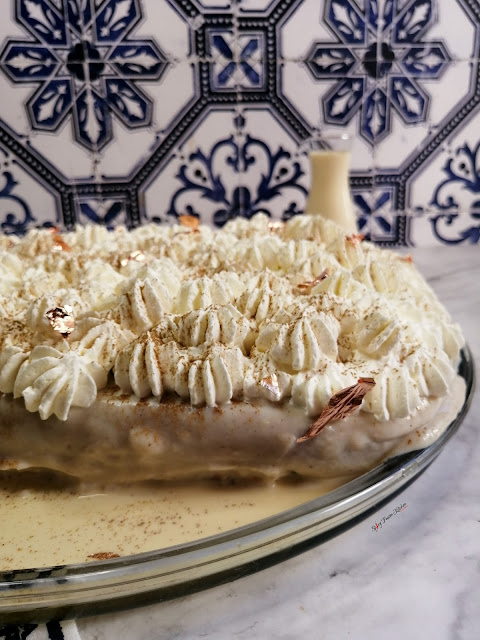
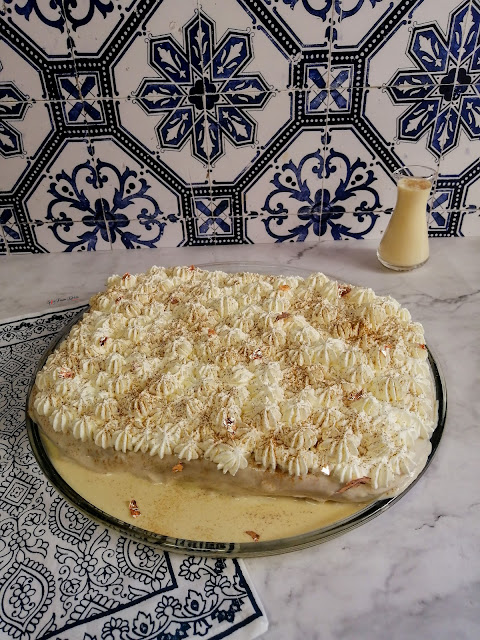
- You will see from my pictures that the whipped cream was quite a lot. I already adjusted the ingredient list to half the usual amount used in the classic tres leches cake. So instead of using 500ml fresh cream and 1/2 cup icing sugar, I suggest half the amount. I think a thinner layer of whipped cream would complement the milk tart layer and cake layer much better.
INGREDIENTS

TRES LECHES CAKE
1 Cup All-Purpose Flour
1 1/2 tsp Baking Powder
1/4 tsp salt
5 Whole Eggs
1 cup Castor Sugar (will need to be divided)
1 tsp Vanilla Essence
1/3 Cup Milk
1 Can Evaporated Milk
1 Can Sweetened Condensed Milk
1 Cup Fresh Cream
MILK TART FILLING
3 Cups Milk
1 Tbsp Butter
385g Sweetened Condense Milk (adjust depending on how sweet you'd prefer
the filling)
1 tsp Vanilla Essence
1 tsp Cinnamon Powder
2 Eggs
4 Tbsp Cornflour
TOPPING
250ml Whipping Cream
1/4 Cup Icing Sugar
1 - 2 Tbsp Powdered Cinnamon
METHOD

- Preheat the oven to 180 degrees Celsius (356 degrees Fahrenheit).
- Using a non-stick spray, spray or coat a deep wide baking pan (as I mentioned in the tips section, you need space over the cake while still in the baking pan, to add a layer of the milk tart filling on top).
- Continue by combining the all-purpose flour, salt, and baking powder in a large bowl.
- Separate the eggs into 2 other bowls.
- Beat the egg yolks with 3/4 cup of castor sugar on high speed, until the yolks are pale yellow.
- Properly stir in the milk and vanilla essence into the egg yolk mixture.
- Pour the egg yolk mixture onto the flour mixture and gently fold until properly combined.
- Next, beat the egg whites at a high speed until soft peaks start to form.
- While the mixer is turned on, add the remaining 1/4 cup castor sugar to the egg whites and beat until the egg whites are stiff (be careful not to overbeat your egg whites or they'll go dry).
- Gently fold the egg white mixture into the batter until it's properly combined.
- Pour the batter into the prepared pan and spread it evenly over the surface.
- Pop it in the oven and bake for 25–30 minutes or till your toothpick comes out clean when you check it (keep checking once you hit the 20-minute mark).
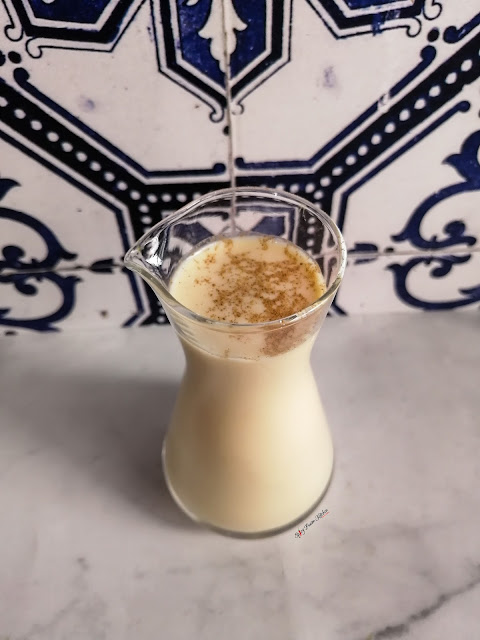
- While the cake is baking, combine in a pitcher your evaporated milk, fresh cream, and sweetened condensed milk, and keep aside.
- Now it's time to make the milk tart filling. In a deep medium-sized pot, add the milk, butter, sweetended condensed milk, and powdered cinnamon. Heat up the mixture on medium heat till it's warm—do not let it start boiling.
- While the mixture is heating up, in a bowl, add your eggs, cornflour, and vanilla. Beat the mixture till it all comes together.
- Once your milk mixture has heated up, take it off the stove and slowly pour the egg mixture in a continuous manner into the pot whilst at the same time whisking vigorously. This will keep the eggs from scrambling as they combine with the hot milk mixture.
- Next, on medium heat, place the pot back on the stove and whisk continuously until the mixture has thickened.
- Remove the from the heat, once the milk tart filling has thickened and leave it to cool down.
- When the cake has finished baking, also leave it to cool down before poking several holes on the surface with a toothpick or fork and slowly drizzling 1 1/2 cups of the milk mixture (that you made in a pitcher) all over the cake and don't forget the edges.
- Time to make the whipped cream. Start to whip the fresh cream and you'll see it begin to thicken up. As it comes closer to stiffening, slowly add in the icing sugar and continue whipping. You want the whipped fresh cream to taste sweet and also maintain stiff peaks. Be careful not to overwhip your fresh cream because it may split.
- When your milk tart filling has cooled down (it's okay if it's a bit warm), give it a quick mix and pour the filling over your cake, spreading it out evenly.
- Pop the cake in the fridge for 1–2 hours just so the milk tart filling can start to set.
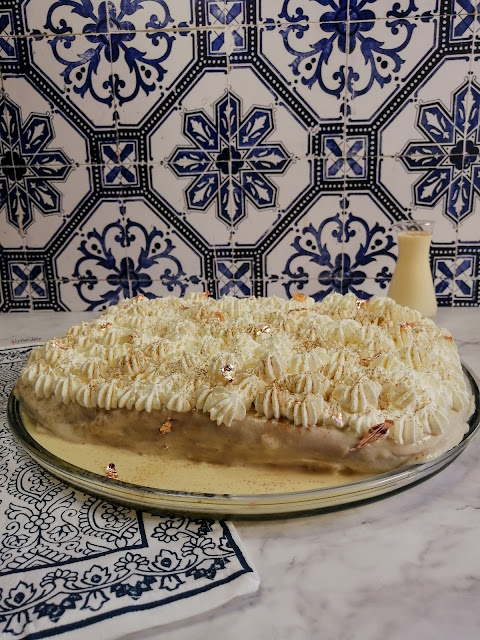
- Next, pipe a thin layer of whipped cream over the milk tart filling. You can see from my picture that the whipped cream was quite a lot. After tasting, I feel a thinner layer of whipped cream would complement the cake along with the milk tart layer much better. I already adjusted the ingredient list to half the amount I initially used - this is just a quick note in case you wonder why your whipped cream isn't as much as in my pictures.
- Gently sift some powdered cinnamon over the whipped cream. I went on to also decorate with some edible rose gold leaf.
- Place the cake back in the fridge. I'd suggest overnight so the milk tart filling sets properly.
- Finally, when serving the milk tart tres leches cake don't forget to serve it with the leftover milk mixture that was in the pitcher, so everyone can pour some over their cake slice, and enjoy.

PIN IT
It is so easy to pin a recipe you like right onto your Pinterest boards.
Simply click on the picture, and it will automatically open up to your
Pinterest,
where you can save the image and recipe link to any board automatically.
I hope you give thisMilk Tart Tres Leches Cake recipe a try and enjoy it.Here are a few othercake and dessert recipes I've shared before;
Be sure to check out my social media,
I share a lot of the behind-the-scenes on there and much more:
This recipe is
Easy Peasy Lemon Squeezy,
inspired by a Snapchat filter,
that made me want to make something lemony.
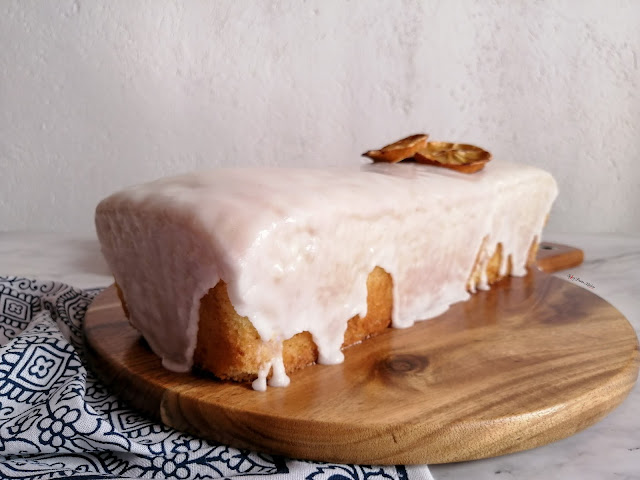
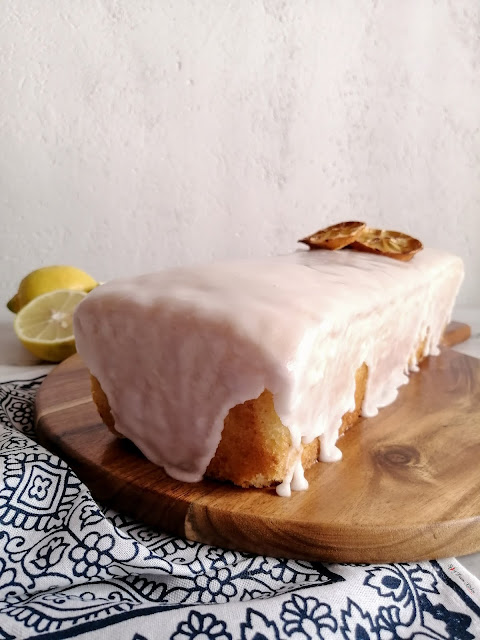
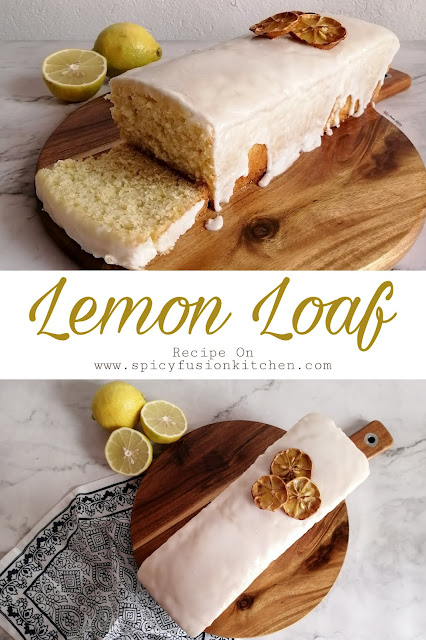
Now that Summer is basically in full swing, we all look for light cakes and desserts to appease our sweet tooth.That being said, nothing beats a simple, yet delicious Lemon Loaf Cake.
As someone who doesn't bake much, I will say this recipe is super easy to
make, and because it's not complicated, you'll be done in no time.
If you have a lot of lemons on hand, with this extreme heat we're experiencing, you can also make some Home-made Lemonade.

- QUICK TIPS -
These are all tips I share in the method,
but I'll note them here as well.
- Remember to be light-handed with the lemon juice. Start off with a little, taste and add more till you're satisfied with the flavour. You should have a hint of the lemon in the batter and icing. It should not be overpowering. When adding lemon in the batter, and in the icing it can flop really quickly, by making everything sour, and you don't want that!
- Do not fill your loaf tin till the top, fill it around 1/2 to 3/4 way, depending on the size of the loaf tin you are using.
- If you're left with a little extra batter, there's no need to waste it, you can always turn those into cupcakes.
- INGREDIENTS -
1 1/4 Cup Castor Sugar (Granulated Sugar)
1 Lemon - Zested
1/4 Cup Fresh Lemon Juice
3 Eggs
2/3 Cup Milk
1/2 Cup Vegetable Oil
2 Cups Cake Flour (or All-purpose Flour)
1 tsp Baking Powder
1/2 tsp Baking Soda
3/4 tsp Salt
1 1/2 Cup Icing Sugar (Powdered Sugar)
1 tsp Fresh Lemon Juice
2 Tbsp Milk
9" x 5" or 16" x 4" Loaf Pan
Wax/Parchment Paper
Grease-Proof Spray
- METHOD -

2. Zest one lemon, keeping the zest to the side, before squeezing the juice out
of the lemon, till you have 1/4 cup, keeping that to the side as well.
3. In your stand mixer bowl, or in a large bowl you use for baking, add in your
castor sugar, and mix in your zested lemon.
4. Next add in your 3 eggs, milk, oil, and mix it at a low speed.
5. While your wet ingredients are being combined, slowly add the1/4 cup of lemon
juice. Personally, I added bit by bit at this step, stopping to taste the
batter until I was happy with the flavour. I did not want the lemon to be
very overpowering, so this was just me being cautious.
6. Once the wet ingredients are combined, add in your sifted flour, baking
powder, baking soda, and salt.
7. Turn your mixer on a lower speed, letting your wet ingredients combine
with the dry ingredients, for 1 - 2 minutes. Remember to not overwork the
batter.
8. Once your batter is smooth, turn off your mixer, and prep your loaf tin. Spray some greaseproof
spray in the tin, before lining it with some wax paper or parchment
paper, in a sling form.
9. Depending on what size loaf tin you will be using, remember not to fill the
batter till the top. Pour in your batter in slowly, and very lightly bang the
loaf tin on the counter 1 - 2 times. This will release any air pockets, and level the
batter as well so it raises, and bakes evenly. Once done, pop it into the oven for 30 - 40
minutes.
10. While your cake is baking, it's time to make your icing. Mix your icing sugar, lemon juice,
and milk in a medium-sized bowl. Once again I added the lemon juice slowly
because I didn't want the icing to taste sour.
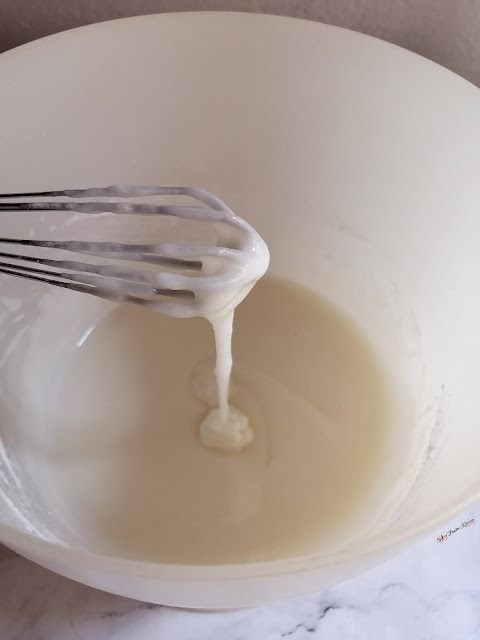
With your whisk mix it all
together till you get a glossy smooth icing. Don't worry, just with that amount of liquid it will combine into icing, just keep whisking.
11. Once your lemon loaf cake has baked, remove it from the oven, and leave
it to cool, before removing it from the loaf tin.
12. Once the cake has cooled it's time to drizzle the icing. If you notice your icing has hardened in the bowl, just give it a quick mix it by hand again, and it should soften and smoothen out. Now you can slowly drizzle the icing over
your cake till it your cake is covered and it drips lightly on the side.

- EXTRA DECORATION SUGGESTIONS -

Which were easy to make, I just sliced some lemons. placed them on a lined baking pan, and popped them in the oven at 100 degrees C, for approximately 1 - 3 hours.
It can be tedious, you have to keep checking on them, they're in the oven for long, and flipping on them, till they're golden, and completely dry.
- PIN IT -
It is so easy to pin a recipe you like right onto your Pinterest boards.
Simply click on the picture, and it will automatically open up to your Pinterest
where you can save the image and recipe link to any board.
I hope you enjoy this Lemon Loaf Cake recipe.
I've shared a few different sweet tooth pleasing recipes,
which you can check out all of them here:
Be sure to check out my social media,
I share a lot of the behind-the-scenes on there and much more:
Now I made this fusion dessert for Ramadan Eid,
and since Eid Al Adha is coming up,
it was the perfect time to post this recipe for you all to give it a
try.
Little rant; from the issues I had just wanting to make this dessert,
and all the pictures issues I had (I lost 95% of the pictures and only a few
restored).
There were just so many technical difficulties that I almost never posted this recipe it!
Anyway,
back to the baklava cheesecake
which was VERY;
delicious,
rich,
delicate,
and definitely will be a
repeat!
If you want to make this in advance;
I think it's best to make it the night before serving.
This gives it enough time to stiffen up in the fridge,
but not so long that the base softens up.
The phyllo/filo can get soft and you don't want that.
You can make the basket base and the filling separately,
and finish it up the night before, which can save a lot of time,
especially if you're making it for an occasion/tea party.
However, like I mentioned down below,
I will make them into individual servings next time.
Please please please read till the end of the recipe,
I share some removing tips and extra thoughts.
- INGREDIENTS -
- BASE -
300g Mixed Nuts (pecans, pistachios, almonds) - Chopped
2 tsp Cinnamon
2 tbsp Flour
3 tbsp Castor Sugar
5 Phyllo/Filo Pastry Sheets
1/4 Cup Butter - Melted
1 Cup Golden Syrup
- FILLING -
300g Milky Bar Chocolate Melted (White Chocolate)
500ml Fresh Cream
1/3 Cup Castor Sugar
375g Cream Cheese
1 tsp vanilla extract
- TOPPING -
Less than 1/3 Cup Mixed Nuts
Dry Rose Buds
- PLEASE NOTE -
I know nuts in general can be quite hard to come by sometimes and it can be
expensive,
you can actually lower the quantity of mixed nuts and it would still taste
amazing.
Around 250g is approximately how much I used as you can see from my
picture.

- METHOD -
- Combine the mixed nuts, castor sugar, cinnamon and flour.
- Pre-heat the oven at 200 Degrees C.
- Prep your spring form pan by oiling all the sides and the base properly.
- Brush each sheet of phyllo/filo with the melted butter and layer it into the pan, one at a time and make sure it's coated properly.
- Repeat this step till it resembles a basket.
- Sprinkle the mixed nuts mix into your basket making sure it covers the base evenly.
- Bake in the oven for 10 - 15 minutes, just till the pastry becomes golden brown.
- Once golden, remove the pan from the oven and quickly pour the golden syrup over the mixed nuts making sure its soaked well (if you feel you want to add more than a cup of golden syrup go right ahead) and leave the pan aside to cool down.
- Melt the white chocolate and leave it to cool down.
- While it's cooling down, make your whipped cream but beating the fresh cream till it forms stiff peaks and leaving it aside.
- In another bowl, whip your cream cheese, vanilla extract and castor sugar till it's all incorporated and smooth.
- Next, when the melted chocolate has cooled down fold it into the whipped cream and than fold in your cream cheese mix.
- Once folded in properly, pour the mixture into the pastry basket.
- Leave it to chill in the fridge for a few hours 5 hours minimum.
- Finally, remove it from the pan (please read my removing tips at the bottom) and place on a cake stand, top with more mixed nuts and some dried rose buds.
- REMOVING TIPS AND SOME EXTRA THOUGHTS -
Removing it from the spring form pan was so stressful.
I don't want to sound dramatic and maybe I just did it wrong,
but since phyllo/filo is so delicate trying to keep the basket
intact,
as I removed the pan and the pan base and placed it onto a cake
stand,
was such a mission and I don't think I'd have been able to do it without my
mum's help.
We removed the side of the spring form pan,
while I held the baklava cheese cake at the bottom and it was still on the
pan base.
I got really close to the cake stand,
my mum lifted the edge of the cake that was close to the stand,
so it would be easy to push the cake onto the stand.
Trying to be delicate by apply pressure to push the cheese cake onto the
stand
was the stressful part.
Don't worry if the basket crumbles a bit,
I just popped those crispy bits onto the cake as I added the
toppings.
This is why I think the next time I make this,
I will definitely make individual baklava cheesecake servings.
That would be much easier to handle and serve.
You can make this same recipe but with individual servings,
by making mini baskets using a cupcake pan,
and cutting your phyllo/filo sheets into small squares.
- PIN IT -
It is so easy to pin a recipe you like right onto your pinterest
boards,
simply click on the picture and it will automatically take you to
pinterest.
When you share the picture the link shares as well,
which makes it easier for you and any one else to find the
recipe.
I hope you enjoy this Baklava Cheesecake recipe,
if you have tried it and you have more tips on removing it, please do share
because that's where I struggled.
Here is a list of more dessert recipes I've shared on my blog:
Be sure to check out my social media,
I share a lot of the behind the scenes on there and
reviews:
Welcome To SFK
Hey Everyone and
As-Salamu-Alaykum
(Peace be upon you)
Hey, I’m Zainab — cooking (and eating) is how I embrace my chubby cheeks, and bring a little joy to the kitchen! I love blending flavours, spices, and cultures to create recipes that are as fun to make as they are to eat. Think bold spices, fusion twists, and meals that are fancy enough to impress but easy enough to whip up any day of the week.
Every recipe I share is something we’ve actually eaten at home — no food styling fakery here (well, maybe just a bit of garnish magic). My step-by-step photos and videos walk you through every stage, so whether you're a kitchen newbie or a seasoned pro, you’ll plate up something delicious and beautiful in no time.
Thank You For The Love
and Support
Zainab
(Botswana, Africa | UK)
(Botswana, Africa |
Recipe Radar
recent posts
Instagram Feed
TikTok
Like For More Recipes On FB
Send me quick message

Most Popular Recipes
-
*Caution* This recipe may contain nuts I know, I know another side dish, however, with Summer in full swing, some ...
-
No it's not actually a marshmallow lol it's not a sweet savoury, however it is as soft as toasted marshmallow when th...
-
With all the savoury recipes it goes without being said that chutney needs to be on the table. Something to dip those fried ...
-
"This sauce will have your taste buds going nuts!" *Caution* this recipe contains nuts...
-
So a lot of you have been asking for a steak recipe, and this is one recipe but we made for our ramadan savouries, in 2 different w...
-
Classic Shakshuka Baked Beans and Sausage Shakshuka Potato Shakshuka "On Sunday's we brunch, and what better d...
-
Is it just me or is Kashmiri Tea and Karak Chai everywhere nowadays? Well because it is trending, it's pretty to...
-
Friday comes and goes so quickly these days, it's so hard thinking of new rice dishes for Jummah (Friday) Lunch. This...