This recipe is
Easy Peasy Lemon Squeezy,
inspired by a Snapchat filter,
that made me want to make something lemony.
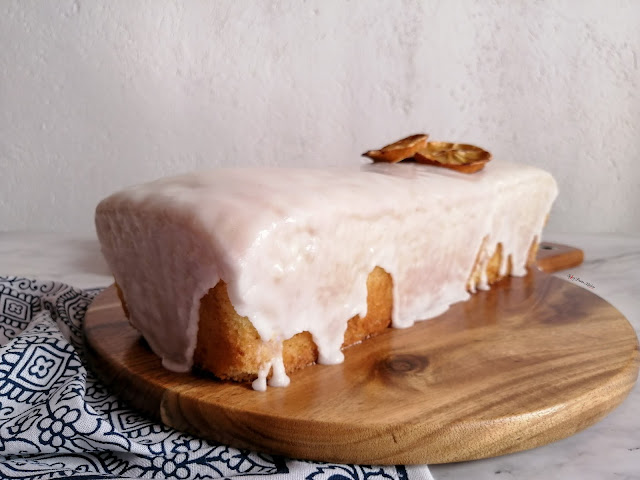
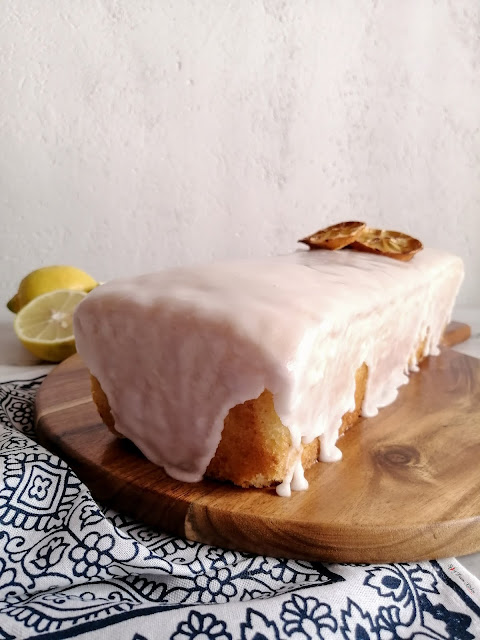
Now that Summer is basically in full swing, we all look for light cakes and desserts to appease our sweet tooth.That being said, nothing beats a simple, yet delicious Lemon Loaf Cake.
As someone who doesn't bake much, I will say this recipe is super easy to
make, and because it's not complicated, you'll be done in no time.
If you have a lot of lemons on hand, with this extreme heat we're experiencing, you can also make some Home-made Lemonade.

- QUICK TIPS -
These are all tips I share in the method,
but I'll note them here as well.
- Remember to be light-handed with the lemon juice. Start off with a little, taste and add more till you're satisfied with the flavour. You should have a hint of the lemon in the batter and icing. It should not be overpowering. When adding lemon in the batter, and in the icing it can flop really quickly, by making everything sour, and you don't want that!
- Do not fill your loaf tin till the top, fill it around 1/2 to 3/4 way, depending on the size of the loaf tin you are using.
- If you're left with a little extra batter, there's no need to waste it, you can always turn those into cupcakes.
- INGREDIENTS -
1 1/4 Cup Castor Sugar (Granulated Sugar)
1 Lemon - Zested
1/4 Cup Fresh Lemon Juice
3 Eggs
2/3 Cup Milk
1/2 Cup Vegetable Oil
2 Cups Cake Flour (or All-purpose Flour)
1 tsp Baking Powder
1/2 tsp Baking Soda
3/4 tsp Salt
1 1/2 Cup Icing Sugar (Powdered Sugar)
1 tsp Fresh Lemon Juice
2 Tbsp Milk
9" x 5" or 16" x 4" Loaf Pan
Wax/Parchment Paper
Grease-Proof Spray
- METHOD -

2. Zest one lemon, keeping the zest to the side, before squeezing the juice out
of the lemon, till you have 1/4 cup, keeping that to the side as well.
3. In your stand mixer bowl, or in a large bowl you use for baking, add in your
castor sugar, and mix in your zested lemon.
4. Next add in your 3 eggs, milk, oil, and mix it at a low speed.
5. While your wet ingredients are being combined, slowly add the1/4 cup of lemon
juice. Personally, I added bit by bit at this step, stopping to taste the
batter until I was happy with the flavour. I did not want the lemon to be
very overpowering, so this was just me being cautious.
6. Once the wet ingredients are combined, add in your sifted flour, baking
powder, baking soda, and salt.
7. Turn your mixer on a lower speed, letting your wet ingredients combine
with the dry ingredients, for 1 - 2 minutes. Remember to not overwork the
batter.
8. Once your batter is smooth, turn off your mixer, and prep your loaf tin. Spray some greaseproof
spray in the tin, before lining it with some wax paper or parchment
paper, in a sling form.
9. Depending on what size loaf tin you will be using, remember not to fill the
batter till the top. Pour in your batter in slowly, and very lightly bang the
loaf tin on the counter 1 - 2 times. This will release any air pockets, and level the
batter as well so it raises, and bakes evenly. Once done, pop it into the oven for 30 - 40
minutes.
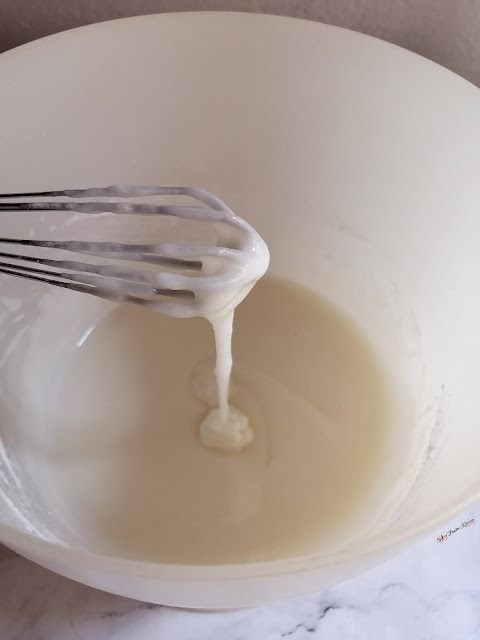
10. While your cake is baking, it's time to make your icing. Mix your icing sugar, lemon juice,
and milk in a medium-sized bowl. Once again I added the lemon juice slowly
because I didn't want the icing to taste sour.
With your whisk mix it all
together till you get a glossy smooth icing. Don't worry, just with that amount of liquid it will combine into icing, just keep whisking.
11. Once your lemon loaf cake has baked, remove it from the oven, and leave
it to cool, before removing it from the loaf tin.
12. Once the cake has cooled it's time to drizzle the icing. If you notice your icing has hardened in the bowl, just give it a quick mix it by hand again, and it should soften and smoothen out. Now you can slowly drizzle the icing over
your cake till it your cake is covered and it drips lightly on the side.

- EXTRA DECORATION SUGGESTIONS -

Which were easy to make, I just sliced some lemons. placed them on a lined baking pan, and popped them in the oven at 100 degrees C, for approximately 1 - 3 hours.
It can be tedious, you have to keep checking on them, they're in the oven for long, and flipping on them, till they're golden, and completely dry.
- PIN IT -
It is so easy to pin a recipe you like right onto your Pinterest boards.
Simply click on the picture, and it will automatically open up to your Pinterest
where you can save the image and recipe link to any board.
I hope you enjoy this Lemon Loaf Cake recipe.
I've shared a few different sweet tooth pleasing recipes,
which you can check out all of them here:
Be sure to check out my social media,
I share a lot of the behind-the-scenes on there and much more:
"Do all things with passion."
This is an easy and quick recipe I was inspired to come up with, that will hit the spot in this heat. Well, unless you're the rest of the world and you're in the middle of winter, lol save it for summer next year. It's delicious and has not become my lifesaver recipe! I plan on making this recipe as mini tarts in the future, which are perfect for any party.
Also, this recipe is a Teatime Treats Collab with some amazing women on Instagram. Which
you can click here to check out my Instagram post and check out the other
ladies' recipes.
Finally, down below, I share the method with the step-by-step pictures. If you would like to follow the method without the pictures, I share that right after. I have also linked other dessert recipes I have shared on my blog before down below, so you can check that out.
INGREDIENTS
CRUST
1 Packet Digestive Biscuits (300g)
1 - 2 Tbsp Brown or White Sugar
1/2 Cup Butter - melted
FILLING
1 Can Condensed Milk (385g)
5 Egg Yolks
2 Tubs Granadilla Pulp (1 Cup)
GARNISH
Edible Flowers
1 Tub Granadilla Pulp (1/2 Cup)
METHOD WITH PICTURES
1. First pre-heat your oven to 180 Degrees C and crush your biscuits in a bowl.
2. Next, add your sugar and butter to your crushed biscuits. Mix it all
together till it's properly incorporated.
3. In your pie or tart tin, spray it down with some greaseproof spray,
before lining the pan with your biscuit mix.
4. Use a spoon to press down the edges and make sure it's all
leveled.
5. Pop your tart tin into the own and bake for 10 - 15 minutes. Once the base is done, remove it from the oven and leave it to cool.
6. While your base is in the oven (or if it's cooling, leave the oven turned on), make your filling. Whisk together your condensed milk, egg yolks, and granadilla pulp. You can strain out the seeds from the mix if you'd like a
smooth filling; I left them in because I liked it that way.
7. Pour your filling into the pan, spreading it over your biscuit base
evenly.
8. Once this is done, place it back into the oven for 20 - 25
minutes.
9. You'll know it's done when the tart has set, but it's a bit jiggly when you move it. So once it's done, remove it from the oven and let it cool down for a few hours before carefully removing it from the tart pan.
10. If you're planning on serving it later on in the day, go ahead and garnish it before leaving it to chill in the fridge. However, if you're serving it the next day, let it chill in the fridge overnight before you garnish it and serve. To decorate it, top it with some more granadilla pulp and edible flowers; you may serve it with whipped cream for extra sweetness.
METHOD WITHOUT PICTURES
- First, pre-heat your oven to 180 Degrees C and crush your biscuits in a bowl.
- Next, add your sugar and butter to your crushed biscuits. Mix it all together till it's properly incorporated.
- In your pie or tart tin, spray it down with some greaseproof spray before lining the pan with your biscuit mix.
- Use a spoon to press down the edges and make sure it's all leveled.
- Pop your tart tin into the own and bake for 10 - 15 minutes. Once your base is done, remove it from the oven and leave it to cool.
- While your base is in the oven (or if it's cooling, leave the oven turned on), make your filling. Whisk together your condensed milk, egg yolks, and granadilla pulp. You can strain out the seeds from the mix if you'd like a smooth filling; I left them in because I liked it that way.
- Pour your filling into the pan, spreading it over your biscuit base evenly.
- Once this is done, place it back into the oven for 20 - 25 minutes.
- You'll know it's done when the tart has set, but it's a bit jiggly when you move it. So once it's done, remove it from the oven and let it cools down for a few hours before carefully removing it from the tart pan.
- If you're planning on serving it later on in the day, go ahead and garnish it before leaving it to chill in the fridge. However, if you're serving it the next day, let it chill in the fridge overnight before you garnish it and serve. To decorate it, top it with some more granadilla pulp and edible flowers; you may serve it with whipped cream for extra sweetness.
PIN IT
It is so easy to pin a recipe you like right onto your Pinterest
boards.
Simply click on the picture, and it will automatically open up to your
Pinterest
where you can save the image and recipe link to any board.
I hope you give this Passionfruit Tart recipe a try.
It will definitely hit the spot, especially in this hot weather.
If you'd like to check out other dessert recipes I've shared before, here is a list;
Be sure to check out my social media,
I share a lot of the behind-the-scenes tips, recipes, and more: